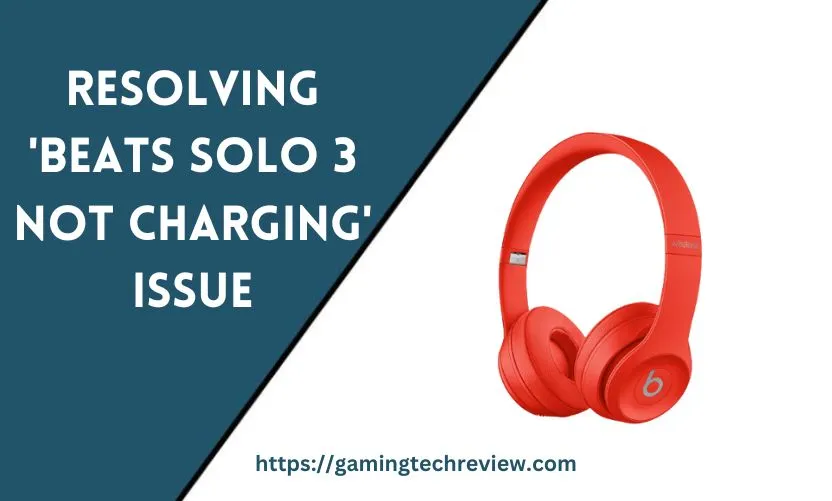
The frustration of trying to enjoy your favorite tunes, only to find that your Beats Solo 3 headphones won’t charge, is all too familiar for many users.
The good news is that this issue can often be resolved with some troubleshooting. In this guide, we’ll explore the common reasons why your Beats Solo 3 headphones may not charge properly, including battery issues, cable problems, and software glitches.
We’ll provide step-by-step troubleshooting instructions to help you identify the root cause of your charging problem and offer effective solutions to resolve the issue.
Additionally, we’ll include tips, advice, and precautions to ensure a smooth troubleshooting and fixing process. So, let’s dive in and get your Beats Solo 3 headphones back in action.
Understanding the Basics
Before we jump into troubleshooting, let’s first understand the basics of how Beats Solo 3 headphones charge. These wireless headphones use a rechargeable battery, which relies on a charging cable and a power source to replenish its energy. When everything is working correctly, charging should be a straightforward process.
Components involved in the Charging Process
To grasp the charging process better, it’s important to know the key components involved:
- Beats Solo 3 Headphones: These headphones have a built-in rechargeable battery that powers the audio playback and noise-canceling features.
- Charging Cable: Typically, Beats Solo 3 headphones come with a USB to micro-USB charging cable. This cable is used to connect your headphones to a power source.
- Power Source: This can be a wall adapter, a USB port on your computer, or a portable power bank. The power source provides the necessary electrical current to charge the headphones.
- Charging Port: On your Beats Solo 3 headphones, there is a micro-USB charging port where you plug in the charging cable.
- LED Indicators: Beats Solo 3 headphones usually have LED lights that indicate the charging status. These lights can help you determine if the charging process is working as it should.
Common Indicators of a Charging Problem
Now that you understand the basic components, let’s look at some common indicators that your Beats Solo 3 headphones may not be charging properly:
- No LED lights: When you plug in your headphones, the LED lights don’t turn on or flash as they should when charging.
- Intermittent charging: The headphones charge sporadically or disconnect frequently during charging.
- Battery drains quickly: Even after leaving your headphones to charge for an extended period, the battery life remains low.
- No response: The headphones do not power on at all, even when connected to a power source.
If you’re experiencing any of these issues, it’s time to start troubleshooting.
See Also: How to Fix Beats Solo 3 Won’t Turn On: 5 Easy Solutions
Troubleshooting Steps
Here’s a step-by-step guide to help you identify and resolve the ‘Beats Solo 3 Not Charging’ issue.
Step 1: Check the Power Source
Start with the basics. Sometimes, the issue lies with the power source rather than the headphones themselves.
1. Testing Different Charging Cables and Adapters
- First, try using a different USB cable. The cable might be damaged or faulty.
- If you have access to multiple chargers, try different adapters as well.
- Ensure that the USB cable is securely connected to both the headphones and the power source.
2. Ensuring the Power Source is Functioning
- Plug your charging cable into a different device (e.g., a smartphone or tablet) to ensure the power source is providing an electrical current.
- If the power source works with other devices but not your headphones, move on to the next step.
Step 2: Inspect the Charging Port
A dirty or damaged charging port can prevent your Beats Solo 3 headphones from charging correctly.
1. Checking for Physical Damage or Debris
- Inspect the micro-USB port on your headphones carefully. Look for any physical damage or foreign objects like lint or dust that might be obstructing the connection.
- If you find debris, use a small, soft brush or compressed air to clean the port gently. Avoid using sharp objects that could damage the port further.
2. Cleaning the Charging Port
- Power off your Beats Solo 3 headphones.
- Dampen a cotton swab or soft cloth with a small amount of isopropyl alcohol (70% or higher).
- Gently clean the charging port, being careful not to let any liquid enter the headphones.
- Allow the port to dry completely before attempting to charge your headphones again.
Step 3: Verify the Battery Status
Understanding your headphone’s battery status can provide valuable insights into the charging problem.
1. Understanding Battery Health Indicators
- Beats Solo 3 headphones have LED lights that indicate battery status. Consult your headphone’s manual to interpret these indicators.
- Some headphones use different colors or flashing patterns to convey information about the battery’s health.
2. How to Check the Battery Status
- Power on your headphones.
- Press and hold the power button while holding them close to your device with Bluetooth enabled.
- On your connected device, check the battery status in the Bluetooth settings. This can give you an idea of whether the battery is charging or if it’s fully depleted.
If the battery status is critically low or not charging, move on to the next step.
Step 4: Soft Reset
A soft reset can help resolve minor issues with your headphones.
1. Performing a Soft Reset on Beats Solo 3
- Power off your headphones.
- Hold down the power button and volume down button simultaneously for about 10 seconds.
- Release the buttons when you see the LED lights flash.
- Power on your headphones and attempt to charge them again.
2. Reconnecting to Bluetooth Devices
- After the soft reset, your Beats Solo 3 headphones may lose their Bluetooth connections.
- Reconnect your headphones to your paired devices and see if the charging issue is resolved.
If the issue persists, proceed to the next step.
Step 5: Firmware Update
Updating your headphones’ firmware can address software-related issues, including charging problems.
1. Checking for Firmware Updates
- Download and install the official Beats Updater app on your computer or smartphone.
- Connect your headphones to the app using the provided instructions.
- Check for available firmware updates and follow the on-screen prompts to install them.
- After updating, try charging your headphones again.
2. How Updates Can Resolve Charging Issues
Firmware updates often include bug fixes and optimizations. It’s possible that an update can address the specific charging issue you’re facing.
Step 6: Contacting Customer Support
If you’ve tried all the steps above and your Beats Solo 3 headphones still won’t charge, it’s time to reach out to customer support.
1. When to Contact Beats Customer Support
- If your headphones are under warranty, contact Beats customer support as soon as possible.
- Even if your warranty has expired, reaching out to customer support can provide you with options for repair or replacement.
2. Warranty and Repair Options
- Beats Solo 3 headphones typically come with a one-year warranty, but the duration may vary by region.
- Customer support will guide you through the warranty process or offer repair options if your headphones are out of warranty.
- Be prepared to provide proof of purchase and the headphone’s serial number when contacting customer support.
Advanced Troubleshooting
If you’ve exhausted the basic troubleshooting steps and still can’t charge your Beats Solo 3 headphones, consider these advanced troubleshooting options.
Exploring Less Common Issues
Sometimes, less common issues can cause charging problems.
1. Overheating During Charging
- If your headphones become excessively hot during charging, disconnect them immediately.
- Overheating can damage the battery and other components.
- Allow them to cool down before attempting to charge again, and ensure they are in a well-ventilated area.
2. Software Conflicts
- Check if any recently installed apps or software updates might be causing conflicts with your headphones.
- Uninstall or disable any apps that might interfere with the Bluetooth or charging functions.
3. Battery Replacement Considerations
- If your headphones are significantly out of warranty and the battery is no longer holding a charge, you might consider battery replacement.
- This should be done by a certified technician, as it involves opening the headphones and soldering a new battery.
Third-party Solutions
While it’s recommended to use official Beats accessories, you might be tempted to try third-party solutions.
1. Using Third-party Charging Accessories
- If you choose to use third-party charging cables or adapters, ensure they are of high quality and compatible with your headphones.
- Cheap or low-quality accessories may damage your headphones or pose safety risks.
2. Risks and Benefits
- Understand the risks involved when using third-party accessories, including potential damage to your headphones or voiding of warranties.
- We recommend sticking with official Beats accessories whenever possible.
DIY Repairs
If you’re experienced with electronics and willing to take the risk, you can attempt to fix charging issues yourself. However, proceed with caution.
1. Detailed Guide for Repairing Charging Issues
- Search online for detailed guides or tutorials on repairing charging issues for Beats Solo 3 headphones.
- Follow the steps carefully, ensuring you have the necessary tools and skills.
- Be aware that attempting a DIY repair can void your warranty and may lead to further damage if done incorrectly.
2. Warnings about DIY Repairs
- Understand that not all charging issues can be resolved with DIY methods, and you could potentially make the problem worse.
- If in doubt, it’s usually best to seek professional assistance or contact Beats customer support.
See Also: How to Power Down Your Beats Studio 3 Headphones: A Handy Guide
Preventing Future Charging Problems
Now that you’ve resolved your charging issue, it’s essential to take steps to prevent it from happening again.
Best Practices for Maintaining Beats Solo 3
To maintain the longevity of your Beats Solo 3 headphones, follow these best practices:
1. Proper Storage and Cleaning
- Store your headphones in a protective case when not in use.
- Regularly clean your headphones to prevent debris from entering the charging port.
2. Avoiding Extreme Temperatures
- Don’t expose your headphones to extreme temperatures, both hot and cold, as this can affect battery performance.
3. Handling with Care
- Treat your headphones with care to prevent physical damage that could lead to charging issues.
- Avoid dropping or subjecting them to unnecessary stress.
Regular Maintenance
Ongoing maintenance can help keep your headphones in top condition.
1. Cleaning Tips
- Periodically clean the charging port with a soft, dry brush or compressed air.
- Wipe down the headphones with a soft, damp cloth to remove dirt and oils.
2. Checking for Firmware Updates
- Regularly check for and install firmware updates to ensure your headphones are running the latest software.
3. Battery Maintenance
- Avoid fully discharging your headphones’ battery regularly. Lithium-ion batteries prefer partial discharge cycles.
- If you anticipate not using your headphones for an extended period, store them with some charge remaining.
Conclusion
In this comprehensive guide, we’ve covered a range of troubleshooting steps and solutions for resolving the ‘Beats Solo 3 Not Charging’ issue. From checking the power source and cleaning the charging port to performing soft resets and contacting customer support, we’ve provided a roadmap for tackling this common problem.
Remember, maintaining your Beats Solo 3 headphones is key to preventing charging issues in the future. Follow best practices, perform regular maintenance, and keep an eye out for firmware updates to ensure your headphones continue to deliver exceptional audio experiences.
If you’ve tried all the troubleshooting steps and still can’t resolve the issue, don’t hesitate to reach out to Beats customer support or explore professional repair options. Your favorite music and podcasts await, and with a little patience and effort, you’ll have your Beats Solo 3 headphones charging and ready to rock once again.


